Quickstart#
Before you begin
Complete Setup first. You should have:
USD Composer installed and built (Kit) - refer to Setup
aif-pipelineCLI installed and verified -aif-pipeline --versionprints a version numberAIF_PIPELINE_SAMPLES_ROOTenvironment variable set -echo $AIF_PIPELINE_SAMPLES_ROOT(Linux) orecho $env:AIF_PIPELINE_SAMPLES_ROOT(Windows) prints your repo root pathVirtual environment active - your prompt shows
(.venv)or you prefix commands withuv run
If any of these are missing or return blank, go back to Setup and work through the steps.
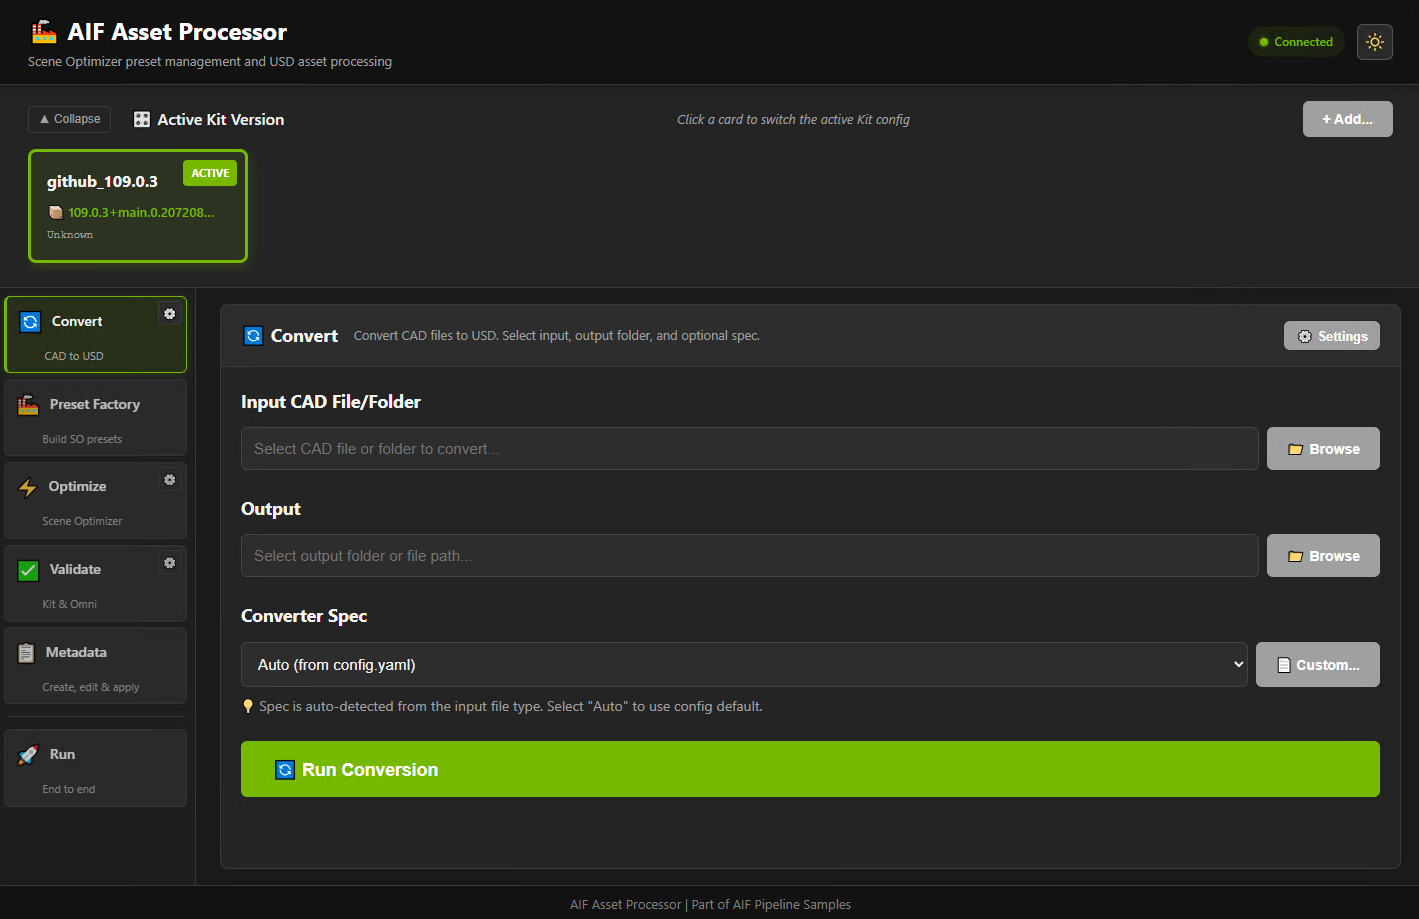
Asset Processor Quickstart#
The Asset Processor is a sample implementation that demonstrates how to build a web front-end on top of the aif-pipeline CLI. In server mode, the Flask back-end calls aif-pipeline convert, optimize, validate, run, and metadata commands through subprocess. You can adapt or extend the pattern for your own pipeline tooling.
Make sure you are in the aif-pipeline-samples repo root with your virtual environment active:
cd D:\projects\aif-pipeline-samples
.\.venv\Scripts\Activate.ps1
cd ~/projects/aif-pipeline-samples
source .venv/bin/activate
Important
asset_processor/server.py is a path relative to the repo root. Running this command from any other directory will fail. You must cd into aif-pipeline-samples first.
Step 1: Start the Server#
Run this from the aif-pipeline-samples repo root (the same directory where you ran uv sync during Setup):
python asset_processor/server.py
You should see output like:
* Running on http://127.0.0.1:8080
Open http://127.0.0.1:8080 in your browser.
Important
The server locks this terminal while it runs. It keeps running even if you close the browser. Press Ctrl+C to stop it.
To run CLI commands (like aif-pipeline optimize) while the server is running, open a second terminal, cd to the repo root, and use uv run aif-pipeline ... there.
If you forget to stop the server and try to start it again, you will get an “Address already in use” error - refer to Asset Processor Troubleshooting for how to find and kill a stale process.
Note
Static mode (index.html opened directly) works for building presets but cannot run pipeline operations from the browser. For the full experience, use server mode.
Tip
You can close the browser and terminal at any time. To restart later:
Open PowerShell
Navigate to the repo root:
cd D:\projects\aif-pipeline-samples
Activate the virtual environment:
.\.venv\Scripts\Activate.ps1
Start the server:
python asset_processor/server.py
Open a terminal
Navigate to the repo root:
cd ~/projects/aif-pipeline-samples
Activate the virtual environment:
source .venv/bin/activate
Start the server:
python asset_processor/server.py
Then reopen http://127.0.0.1:8080. No reinstallation is needed.
Step 2: Add a Kit Configuration#
On first launch, the landing page shows “No Kit configurations found.” This is expected - you have not pointed the tool at your Kit installation yet.
Click the + Add button at the top of the page.
In the dialog, enter a name for this configuration (for example,
composer-109).For the Kit project root, paste the path to the directory that contains
repo.bat/repo.sh(Kit App Template) or the top-level NGC extract directory. Examples:
Install type |
Example path |
|---|---|
Kit App Template |
|
NGC manual install |
|
Install type |
Example path |
|---|---|
Kit App Template |
|
NGC manual install |
|
Warning
Do not pass a subdirectory like _build/ or _build/linux-x86_64/release/. The tool finds the Kit executable and release directory automatically from the project root.
Click Add. A configuration card appears with:
The config name you entered
The Kit version (for example, 109.0.3)
A green Active badge
A truncated Kit executable path
This is the expected state. You are ready to build presets.
Each card represents a Kit installation that the pipeline uses for conversion, optimization, and validation. Clicking a card makes it active (green badge). You can have multiple Kit configurations side-by-side - useful when testing assets against different Kit versions or validation rule sets.
Tip
If you have not installed Kit yet, refer to Setup for installation options.
Note
Configurations are stored as YAML files in ~/.aif-pipeline/ (%USERPROFILE%\.aif-pipeline\ on Windows). Always use the UI or CLI to add, switch, or delete configs - editing the files directly can cause the active config to fall out of sync. Individual settings (conversion concurrency, timeouts, etc.) can be adjusted via the cog icon next to each workflow section (Convert, Optimize, Validate) in the Asset Processor sidebar. Refer to CLI Reference for details on config file locations and priority.
CLI alternative
You can also configure Kit from the command line instead of the UI:
aif-pipeline config add kit_template --from "D:/build/kit-app-template"
aif-pipeline config add kit_template --from ~/kit-app-template
Refer to the CLI Quickstart section below for full details.
Step 3: Build a Simple Preset#
Click Preset Factory in the left sidebar. You should see three panels:
Library (left) - a list of available Scene Optimizer processors. If the list is empty, click Update Library to populate it from the active Kit configuration (this requires the Kit executable to work - see Step 2).
Preset (center) - currently empty, with a “Drag processors here” placeholder.
Parameters (right) - empty until you select a processor to configure.
Create a minimal preset for cleaning up a CAD-converted USD file:
Add Edit Stage Metrics - In the library, find “Edit Stage Metrics” (or type it in the search box). Drag it to the preset area. It appears with badge #1.
Add Mesh Cleanup - Search “Mesh Cleanup”, drag it below the first card. Badge #2 appears.
Add Decimate Meshes - Search “Decimate”, drag “Decimate Meshes” to the preset.
Add Generate Normals - Search “Generate Normals”, drag it to the preset.
Add Compute Extents - Search “Compute Extents”, drag it to the end (should always be last).
You should now have five numbered cards in the preset area.
Step 4: Configure Parameters#
Click Configure on the “Edit Stage Metrics” card. The Parameters panel (right) populates with its settings.
Set Meters Per Unit to
1.0and Up Axis toZ.Click Configure on the “Decimate Meshes” card. The right panel switches to show Decimate parameters.
Set Reduce To Percentage to
0(default is 50), Max Mean Error to0.0001(0.1 mm tolerance), and check Pin Mesh Boundaries.Leave other processor settings as default.
Step 5: Save Your Preset#
Click Save Preset in the header.
Your browser downloads the preset as a JSON file (for example,
my_first_preset.json). Note the location - you will need this file path in the next step.
Step 6: Optimize an Asset with the Preset#
In the Asset Processor UI, click Optimize in the left sidebar.
Input - Click Browse (or paste a path) to select a USD file or a directory of USD files.
Output - Set an output path. This can be a different directory to preserve your originals.
Preset - Click Browse and select the preset JSON you saved in Step 5 (for example,
my_first_preset.json).Click Run Optimization.
The server calls aif-pipeline optimize under the hood. You should see a live log stream in the browser showing each processor as it runs. When optimization finishes, a summary line appears with the elapsed time.
Tip
You can also run the same optimization from the command line - this is especially useful for batch processing or scripting:
aif-pipeline optimize input.usd output.usd --preset my_first_preset.json
The command produces the same result as the UI.
What the Preset Does#
The preset runs these operations in order:
editStageMetrics - Set metersPerUnit=1.0, upAxis=Z
meshCleanup - Merge vertices, remove degenerate faces
decimateMeshes - Reduce polygons with 0.1 mm max error
generateNormals - Compute new normals
computeExtents - Calculate bounding boxes
CLI Quickstart#
The Asset Processor UI calls the aif-pipeline CLI under the hood. You can run the same commands directly from the terminal for scripting, batch processing, and CI/CD integration.
If you already added a Kit configuration through the UI in Step 2, the CLI is already configured - run aif-pipeline config show to confirm that kit.path is populated.
Make sure you are in the aif-pipeline-samples repo root with your virtual environment active:
cd D:\projects\aif-pipeline-samples
.\.venv\Scripts\Activate.ps1
cd ~/projects/aif-pipeline-samples
source .venv/bin/activate
Configure Kit Paths#
If you did not configure Kit through the Asset Processor UI, you can link the CLI to your USD Composer installation from the command line. Point --from at the Kit project root - the directory that contains repo.bat/repo.sh (Kit App Template) or the top-level NGC extract directory. Do not pass a subdirectory like _build/ or _build/linux-x86_64/release/. The CLI finds those automatically.
Pick one of the commands below (Kit App Template or NGC) - you only need to run it one time:
# Kit App Template (contains repo.bat) - copy-paste this, replacing the path:
aif-pipeline config add kat_109 --from "D:/build/kit-app-template"

# OR NGC manual install - copy-paste this, replacing the path:
aif-pipeline config add ngc_109 --from "D:/build/ngc/USD_Composer_109.0.3"
# Kit App Template (contains repo.sh) - copy-paste this, replacing the path:
aif-pipeline config add kat_109 --from ~/kit-app-template

# OR NGC manual install - copy-paste this, replacing the path:
aif-pipeline config add ngc_109 --from ~/build/ngc/USD_Composer_109.0.3
You should see output similar to:
Auto-detecting Kit paths from: D:/build/kit-app-template
Build type: Kit App Template
OK Kit executable: D:\build\kit-app-template\_build\windows-x86_64\release\kit\kit.exe
OK Release directory: D:\build\kit-app-template\_build\windows-x86_64\release
OK App name: my_company.my_usd_composer.kit
OK Configuration saved to: C:\Users\<you>\.aif-pipeline\config.yaml
If you see WARNING Kit executable not found, verify you passed the Kit project root (the directory with repo.bat/repo.sh), not _build/ or a subdirectory. Also confirm the project has been built (repo.bat build or ./repo.sh build).
This automatically finds and configures:
Kit executable (
kit.exeon Windows,kiton Linux) inside_build/<platform>/release/kit/orkit/Release directory
App name
CAD converter version
Asset validator version
Scene Optimizer validator version
The config file also stores default settings for each pipeline action - conversion concurrency, optimization presets, validation mode, and more. You can view your current config with aif-pipeline config show and adjust individual values with aif-pipeline config set. Refer to CLI Reference for the full configuration reference.
Multiple Kit Versions
For multiple Kit versions, use named configurations:
aif-pipeline config add kat_109 --from "D:/build/kit-app-template"
aif-pipeline config add ngc_110 --from "D:/build/ngc/USD_Composer_110.0.0"
aif-pipeline config list
aif-pipeline config use ngc_110
aif-pipeline config add kat_109 --from ~/kit-app-template
aif-pipeline config add ngc_110 --from ~/build/ngc/USD_Composer_110.0.0
aif-pipeline config list
aif-pipeline config use ngc_110
Quick Test#
Verify your configuration:
aif-pipeline config show
You should see a YAML dump of your configuration with kit.path and kit.release_dir populated (not null). If either value is null, the auto-detection did not find a Kit executable - revisit the Configure Kit Paths step above or add a configuration through the Asset Processor UI.
Get help for any command:
aif-pipeline convert --help
aif-pipeline optimize --help
aif-pipeline validate --help
For full CLI usage with real directories, refer to CLI Reference.
Troubleshooting#
Kit executable not found / Release directory not found#
If aif-pipeline config add reports missing executables or release directories:
Confirm that the Kit build completed successfully (Step 6 in Setup Option 2).
Verify the path you passed to
--from(or entered in the +Add dialog) points to the Kit project root - the directory containingrepo.batorrepo.sh(Kit App Template) or the top-level NGC extract directory. Do not pass_build/or_build/linux-x86_64/release/. The CLI resolves those automatically.On Linux, ensure execute permissions on both the build script and the Kit executable:
chmod +x repo.sh
chmod +x _build/linux-x86_64/release/kit/kit
No configurations found in Asset Processor#
The Asset Processor shows “No Kit configurations found” when no config files exist in ~/.aif-pipeline/. On first launch this is expected - follow Step 2: Add a Kit Configuration to add one through the UI.
If you previously added a configuration and it disappeared:
In a separate terminal (keep the server running), run
aif-pipeline config show. Ifkit.pathisnull, the configuration is missing or incomplete.Click + Add in the Asset Processor UI to re-add it, or run
aif-pipeline config add <name> --from <kit_project_root>from the CLI.Refresh the browser. The configuration card should now appear.
apt 404 errors when installing Python (Linux)#
Corporate or horde apt mirrors can be outdated. Before trying to install Python:
python3 --version
If Python 3.10-3.12 is already installed, skip the apt install step. If you need a specific version, use uv python install 3.11 instead.
Next Steps#
Load an existing preset - Click Load Preset in the Asset Processor and open
$AIF_PIPELINE_SAMPLES_ROOT/so/generic/generic_preset.jsonto review a preset with multiple operations.CAD to USD - End-to-end CAD-to-USD pipeline
Asset Processor - Asset Processor reference (opening modes, library updates, troubleshooting)
CLI Reference - Full CLI reference
Scene Optimizer Presets - Preset concepts and examples